Ford Mustang (1999-2004) Service Manual: Motor - Windshield Wiper
Removal
CAUTION: The internal permanent magnets used in the windshield wiper motor are made of a glass-like material. To avoid damaging the magnets, do not strike the motor with a hammer or any other object.
NOTE: The windshield wiper motor is not a repairable item. If worn or damaged, install a new wiper motor.
1. Park the windshield wipers in the full upright position. This will allow for easy access to the retaining clip on the wiper motor output shaft.
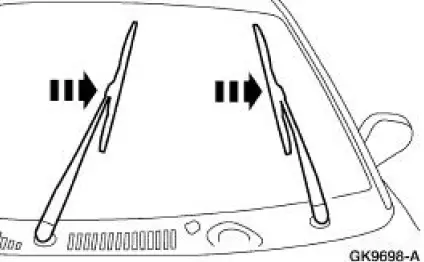
2. Remove the cowl top vent panels.
3. Disconnect the negative battery cable.
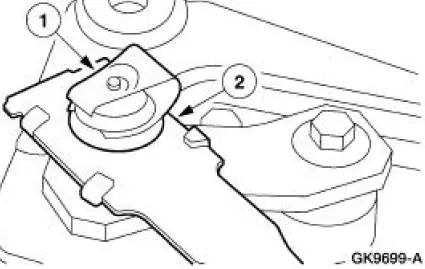
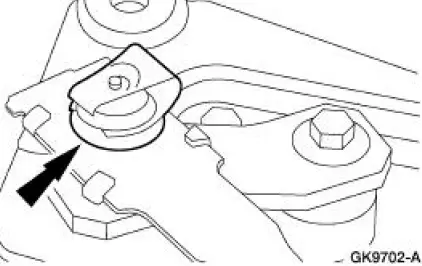
4. Disconnect the mounting arm and pivot shaft linkage from the wiper motor output shaft.
1. Remove the clip.
2. Disconnect the mounting arm and pivot shaft linkage.
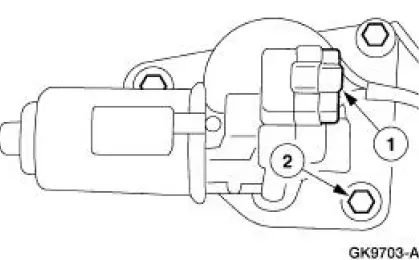
5. Remove the wiper motor.
1. Disconnect the electrical connector.
2. Remove the bolts.
Installation
1. NOTE: Install the retaining clip onto the mounting arm and pivot shaft linkage prior to the installation of the wiper motor.
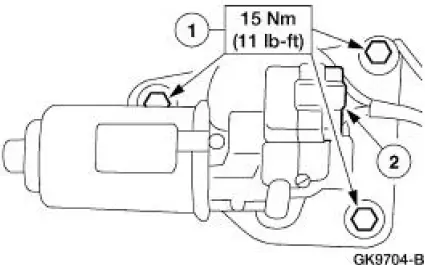
Install the wiper motor
1. Install the bolts.
2. Connect the electrical connector.
2. Snap the mounting arm and pivot shaft linkage onto the wiper motor output shaft.
3. NOTE: When the battery is disconnected and reconnected, some abnormal drive symptoms may occur while the vehicle relearns its adaptive strategy. The vehicle may need to be driven 16 km (10 miles) or more to relearn the strategy.
Reconnect the negative battery cable.
4. Cycle the wiper motor to the park position.
5. Install the cowl top vent panels.
- Adjust pivot arms as necessary. Refer to Wiper Blade and Pivot Arm Adjustment .
 Mounting Arm and Pivot Shaft
Removal
1. Park the windshield wipers in the full upright position. This will
allow for easy access to the
retaining clip on the wiper motor output shaft.
2. Remove the cowl top vent panels.
...
 Washer Pump
Removal
1. Remove the LF wheel and tire. Refer to Section.
2. Position the front portion of the LF inner splash shield aside.
3. WARNING: Windshield washer solution contains methanol, which is ...
Other materials:
Torque Converter (Description and Operation)
The torque converter transmits and multiplies torque. The torque
converter is a four-element device:
impeller assembly
turbine assembly
reactor assembly
clutch and damper assembly
The standard torque converter components operate as follo ...
Digital Transmission Range (TR) Sensor
Special Tool(s)
Alignment Gauge, TR Sensor
307-351 (T97L-70010-A)
Removal
1. Disconnect the battery ground cable. For additional information, refer
to Section.
2. Raise and support the vehicle. For additional information, refer to
Sectio ...
Striker Adjustment
NOTE: After adjusting the door latch striker plate, verify that the
door can be closed easily and fits
tightly.
1. Loosen the door latch striker plate bolts.
2. Reposition the door latch striker plate from side to side or up and down
as necessary.
...
