
Ford Mustang (1999-2004) Service Manual: Removal
CAUTION: Suspension fasteners are critical parts because they affect performance of vital components and systems and their failure can result in major service expense. A new part with the same part number must be installed if installation becomes necessary. If substitution is necessary, the part must be of the same finish and property class. Torque values must be used as specified during reassembly to make sure of correct retention of these parts.
1. Raise the vehicle on a hoist.
2. Remove the wheel and tire assembly.
3. Remove the rear brake disc.
4. Support the lower suspension arm and bushing (5A649) with a jack stand.
5. Remove the nut and bolt and disconnect the shock absorber (18125) from the lower suspension arm and bushing. Discard the nut and bolt.
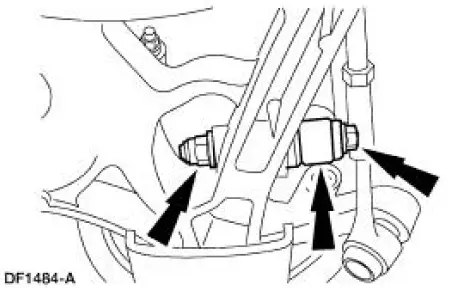
6. Remove and discard the cotter pin and nut.
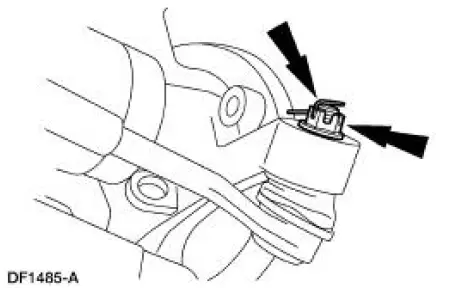
7. CAUTION: Do not strike the toe link or the knuckle to disconnect the toe link. The toe link or the knuckle can be damaged.
Using the special tool, disconnect the toe link (5K848) from the knuckle (5A968/5A969).
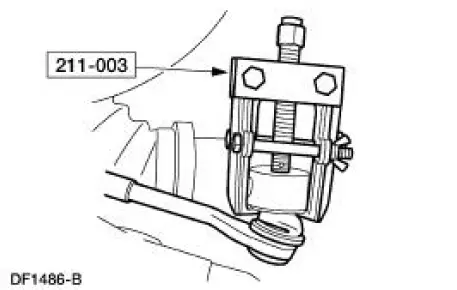
8. Remove the nut, bolt and the toe link. Discard the bolt and nut.
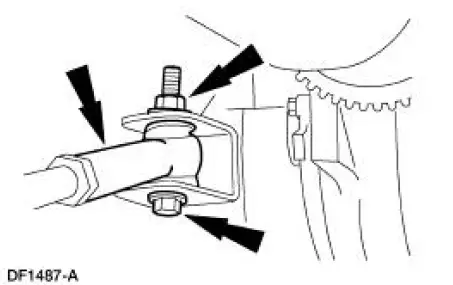
 Toe Link - Cobra
Special Tool(s)
Steering Arm Remover
211-003 (T64P-9171-A)
...
 Installation
1. CAUTION: Make sure the hardened washer is installed between the
lower
suspension arm and bushing and the shock absorber. Failure to do so can result
in
damage and failure of the lower suspension ...
Other materials:
Removal
1. Disconnect the battery negative cable.
2. Drain the engine cooling system.
3. Remove the LH exhaust manifold. For additional information, refer to
Exhaust Manifold-LH in
this section.
4. Remove the lower intake manifold. For additional informatio ...
Cleaning the instrument panel and instrument cluster lens
WARNING: Do not use chemical solvents or strong detergents
when cleaning the steering wheel or instrument panel to avoid
contamination of the airbag system.
Clean the instrument panel and cluster lens with a clean, damp, white,
cotton cloth, then use a clean a ...
Torque Converter Turbine to Pump Stator Interference
Check
1. NOTE: Front pump support may remain in front pump support and gear
during this test.
Position the torque converter with the pump drive up.
2. Install the front pump support to engage the mating splines of the front
pump support shaft on
the torque convert ...
