Ford Mustang (1999-2004) Service Manual: Moulding - Roof Side
Removal and Installation
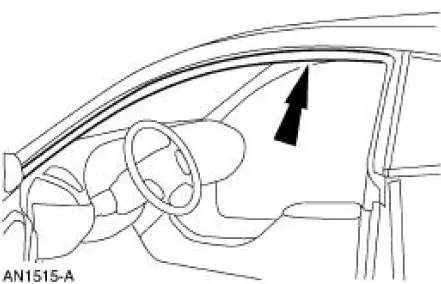
1. Remove the weatherstrip.
2. Remove the exterior roof side moulding screws.
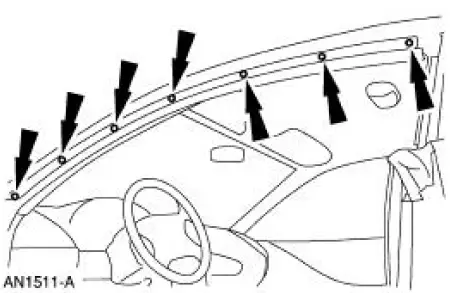
3. Remove the interior roof side moulding screws.
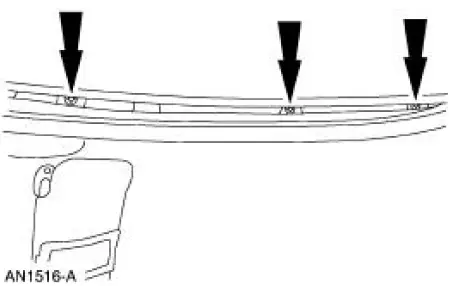
4. Remove the roof side moulding screw.
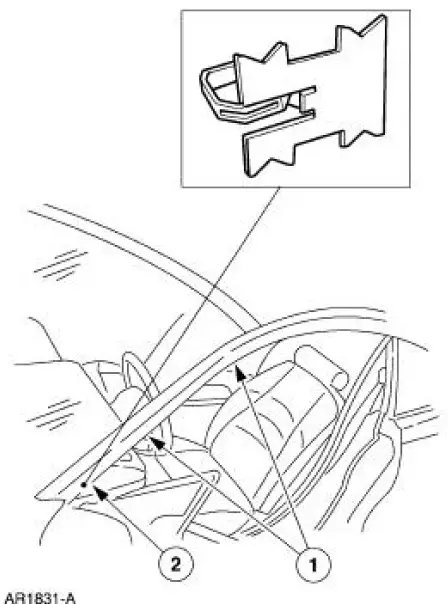
5. Release the clips.
1. Lift up to release the two clips.
2. NOTE: Grasp the roof side moulding and lift up to release the money clip.
Remove the money clip.
6. Remove the upper quarter trim panel. For additional information, refer to Section.
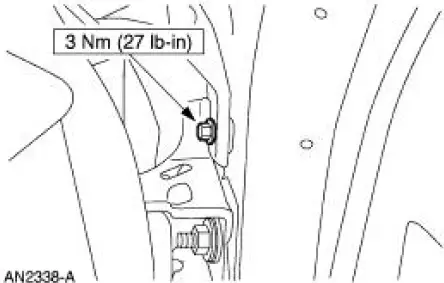
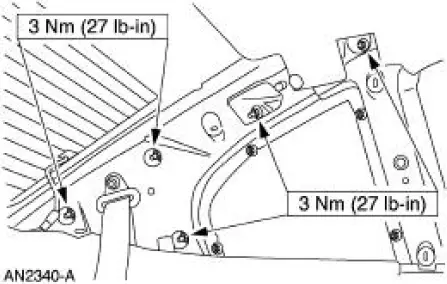
7. Remove the nuts and the roof side moulding.
8. To install, reverse the removal procedure.
 Exterior Trim and Ornamentation
Torque Specifications
Exterior Trim and Ornamentation
The exterior trim and ornamentation consists of the following
components:
body side scoop
hood scoop (if equipped)
front spoiler ...
 Moulding - Rocker Panel
Removal
1. Remove the front rocker panel moulding screw.
2. Remove the strip.
3. Remove the rear rocker panel moulding screw.
4. Remove the pin-type retainers and the rocker panel moulding.
...
Other materials:
Exhaust Manifold to Exhaust Gas Recirculation (EGR)
Valve Tube - Mach I
Removal
1. Remove the air intake scoop. For additional information, refer to
Section.
2. Disconnect the exhaust gas recirculation (EGR) tube from the EGR valve.
3. With the vehicle in NEUTRAL, position it on a hoist.
4. Disconnect the EGR tube from th ...
Supercharger Belt Tensioner
Removal and Installation
1. Remove the supercharger drive belt cover.
2. Rotate the supercharger belt tensioner clockwise and remove the
supercharger belt.
3. Remove the bolts and the supercharger belt tensioner.
4. To install, reverse the removal proced ...
Engine Support Insulators
Special Tool(s)
3 Bar Engine Support Kit
303-F072
Engine Lift Bracket Set
303-D095 (D94L-6001-A) or
equivalent
...
