Ford Mustang (1999-2004) Service Manual: Multifunction Electronic Control Modules
Torque Specifications
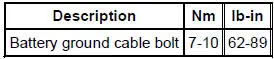
Module Controlled Functions
The generic electronic module (GEM)(14B205) is the only multifunction control module on this vehicle.
The GEM controls the following functions:
- warning chimes and warning lamps
- one-touch down window
- windshield washers and wipers
- battery saver
- illuminated entry with keyless remote entry
- interior lighting
Module -Generic Electronic (GEM)
Removal
1. CAUTION: Electronic modules are sensitive to static electrical charges. If exposed to these charges, damage may result.
Disconnect the battery ground cable (14301).
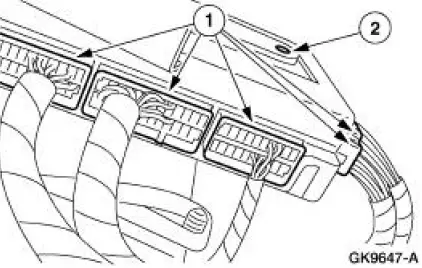
2. Remove the generic electronic module (GEM)(14B205).
1. Remove the five electrical connectors.
2. Release the locking tab and slide the module off the bracket.
Installation
1. NOTE: When the battery (10655) is disconnected and reconnected, some abnormal drive symptoms may occur while the vehicle relearns its adaptive strategy. The vehicle may need to be driven 10 mile s (16 km) or more to relearn the strategy.
To install, reverse the removal procedure.
 Module - Passive Anti-Theft Transceiver
Removal
1. CAUTION: Electronic modules are sensitive to electrical
charges. If exposed to
these charges, damage may result.
Disconnect the battery ground cable (14301).
2. Remove the igni ...
 Body
Body
...
Other materials:
Removal
CAUTION: Since the engine is not free-wheeling, if the crankshaft or
the camshafts are
moved in any manner during removal and installation, the crankshaft and the
camshafts must
be re-synchronized.
1. Remove the engine front cover. For additional informatio ...
Exhaust Manifold to Exhaust Gas Recirculation (EGR)
Valve Tube - Cobra
Removal and Installation
1. Remove the EGR valve. For addditional information, refer to Exhaust
Gas Recirculation (EGR)
Valve-Cobra in this section.
2. With the vehicle in NEUTRAL, position it on a hoist.
3. Disconnect the exhaust manifold to EGR valve ...
Washer Pump
Removal
1. Remove the LF wheel and tire. Refer to Section.
2. Position the front portion of the LF inner splash shield aside.
3. WARNING: Windshield washer solution contains methanol, which is
poisonous.
Observe all cautions and warnings indicate ...
