Ford Mustang (1999-2004) Service Manual: Pressure Relief
Special Tool(s)
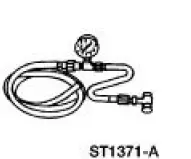 |
Fuel Pressure Gauge 310-012 (T80L-9974-B) |
WARNING: Do not smoke or carry lighted tobacco or open flame of any type when working on or near any fuel-related components. Highly flammable mixtures are always present and may be ignited, resulting in possible personal injury.
WARNING: Fuel in the fuel system remains under high pressure even when the engine is not running. Before servicing or disconnecting any of the fuel lines or fuel system components, the fuel system pressure must be relieved to prevent accidental spraying of fuel, causing personal injury or a fire hazard.
1. Remove the Schrader valve cap and install the Fuel Pressure Gauge.
2. CAUTION: Open the manual valve slowly on the Fuel Pressure Gauge.
Relieve the fuel pressure.
- Place the fuel in a suitable container.
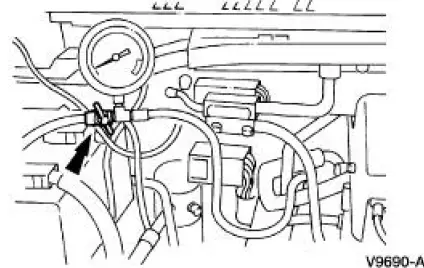
 Fuel System (Description and Operation)
Component Location
WARNING: Do not smoke or carry lighted tobacco or open flame of any
type when
working on or near any fuel-related components. Highly flammable mixtures are
always prese ...
 Fuel Tank Draining
Special Tool(s)
Fuel Storage Tanker
164-R3202 or equivalent
Fuel Tank Drain Hose
310-F013
WARNING: Do not smoke or carry lighted tobacco or an open flame of any
type whe ...
Other materials:
Fuel Vapor Control Tube Assembly Valve
Removal and Installation
1. Remove the fuel tank. For additional information, refer to
Section.
2. Remove the retainers.
3. NOTE: The fuel vapor vent valve, fuel vapor control valve and the
in-line fuel tank pressure
sensor are repaired as a fuel va ...
Refrigerant Lines
The condenser to evaporator tube (19835) contains the high pressure liquid
refrigerant upstream of the
evaporator core orifice.
The A/C manifold and tube (19D734) is attached to the A/C compressor, is sealed
with O-ring seals,
and has the following features ...
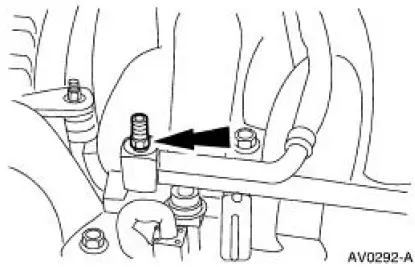
Crankshaft Position (CKP) Sensor - 3.8L
Removal
1. Disconnect the battery ground cable. For additional information,
refer to Section.
2. Remove the crankshaft position (CKP) sensor.
Disconnect the connector.
Remove the bolts and the sensor.
Installation
1. To install, reverse ...
