Ford Mustang (1999-2004) Service Manual: Range Selection
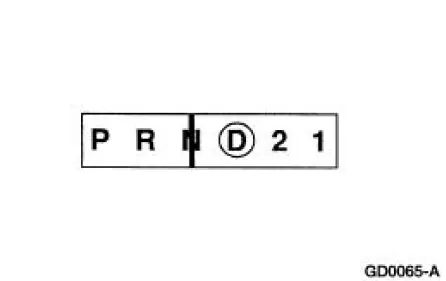
The transmission has six range positions: P, R, N, (D), 2 and 1.
Park
In the PARK position:
- there is no powerflow through the transmission.
- the parking pawl locks the output shaft to the case.
- the engine can be started.
- the ignition key can be removed.
Reverse
In the REVERSE position:
- the vehicle can be operated in a rearward direction, at a reduced gear ratio.
- engine braking will occur.
Neutral
In the NEUTRAL position:
- there is no powerflow through the transmission.
- the output shaft is not held and is free to turn.
- the engine can be started.
Overdrive
Overdrive is the normal position for most forward driving.
The OVERDRIVE position provides:
- Automatic shifts.
- Apply and release of the torque converter clutch.
- Maximum fuel economy during normal operation.
Second Position
This position provides:
- Second gear start and hold.
- The torque converter clutch can apply and release.
- Improved traction and engine braking on slippery roads.
- Engine braking for descending steep grades.
First Position
If this position is selected at normal road speeds, the transmission will shift into second gear, then into first when the vehicle reaches a speed below approximately 45 km/h (28 mph).
This position provides:
- First gear operation only.
- Engine braking for descending steep grades.
 Identification Tags
All vehicles are equipped with a Vehicle Certification Label, located
on the driver side door lock post.
For correct transmission identification, refer to the code in the space
marked TR.
...
 Shift Patterns
Upshifts
Transmission upshifting is controlled by the powertrain control
module (PCM). The PCM receives
inputs from various engine or vehicle sensors and driver demands to
control shift sche ...
Other materials:
Stay Pad - Convertible Top
Removal
1. Remove the convertible top material. For additional information, refer to
Convertible Top
Material in this section.
2. Remove the rear window glass. For additional information, refer to
Convertible Top Assembly-
Rear Window Glass in this section. ...
Chuckle
Chuckle that occurs on the coast driving phase is usually caused by excessive
clearance between the
differential gear hub and the differential case bore.
Damage to a gear tooth on the coast side can cause a noise identical to a
chuckle. A very small tooth
n ...
Cylinder Block Core Plug Replacement
Special Tool(s)
Slide Hammer
100-001 (T50T-100-A)
Material
1. Use a slide hammer or tools suitable to remove the cylinder block core
plug.
2. Inspect the cylinder block plug bore for any damage that would interfere
with the correct sealing ...
