Ford Mustang (1999-2004) Service Manual: Installation
All vehicles
CAUTION: After installing the urethane installed windshield, the vehicle should not be driven until the urethane adhesive has cured. The curing time at temperatures above 13C (55 F) and relative humidity above 50% is 12-24 hours (Refer to ESSEX drive away chart for cure times as temperatures and humidity vary). Inadequate curing of the urethane adhesive may adversely affect the strength of the urethane adhesive bond.
1. Dry-fit the windshield glass by centering it side-to-side and by adjusting the setting blocks (if equipped) to get the correct position of the part top-to-bottom. Make alignment marks with tape or non-staining grease pencil on both the glass and the vehicle body.
2. CAUTION: Care must be taken to avoid scratching the pinch weld.
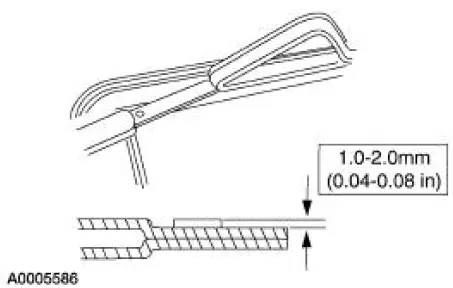
Trim the remaining urethane on the pinch weld using only the full-cut method. in this method, most of the existing urethane is removed leaving a level bead around the entire pinch weld.
3. Using a wool applicator, apply the Urethane Metal Primer Essex U-413 meeting Ford specification WSB-M2G234-C to any exposed metal on the pinch weld. Allow 6 to 10 minutes to dry.
4. If reinstalling the original windshield glass, remove the excess urethane adhesive from the windshield glass.
5. If installing a new windshield glass, clean the inside of the glass surface with an alcohol-free cleaner to make sure the ceramic-coated area is clean.
6. CAUTION: Wipe off the urethane glass prep immediately after each application because it flash dries. Apply deliberate strokes, making sure not to overlap the applied area.
If installing a new windshield glass, apply Urethane Glass Prep Essex U-401 meeting Ford specification WSB-M2G314-B twice around the class surface to be prepped.
7. If installing a new windshield glass, apply Urethane Glass Primer Essex U-402 meeting Ford specification WSB-M5B280-C to the same area that was in the previous step. Allow five minutes to dry.
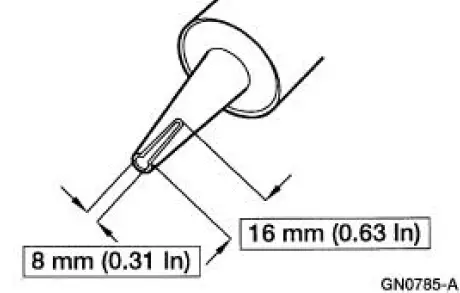
8. Cut the applicator tip to specification.
9. CAUTION: If the vehicle is to be driven within 24 hours of urethane adhesive application, Urethane Adhesive Essex U-216 meeting Ford specification WSB-M2G316-B must be used due to its one hour cure time.
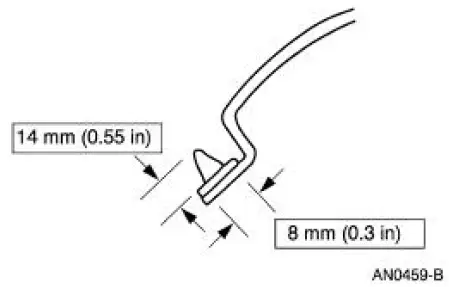
Apply a bead of Urethane Adhesive Essex 400-HV or Essex U-216 meeting Ford specification WSB-M2G316-B to the pinch weld.
10. CAUTION: Open a window to prevent the windshield glass from being pushed out by air pressure when a door is closed.
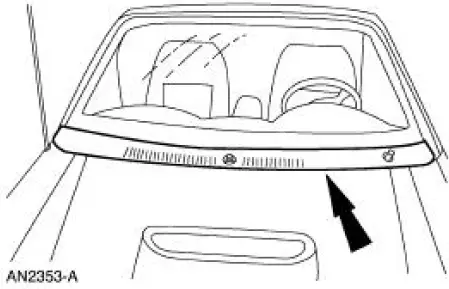
Using the alignment marks install the windshield glass.
11. After the glass is set, check for water leaks and add urethane adhesive where needed.
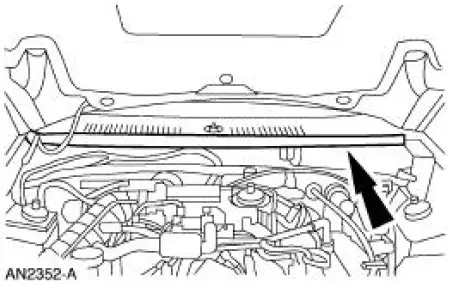
12. Install the cowl grille.
13. Install the cowl grille weatherstrip.
14. Install the two windshield wiper pivot arms.
- Position the arms.
- Install the windshield wiper pivot arms.
15. Install the headliner.
Coupe
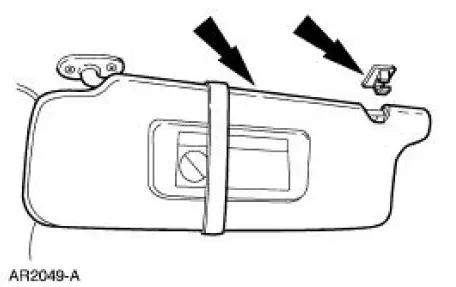
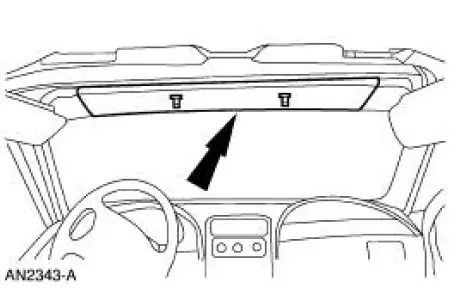
16. Install the sun visors and clips.
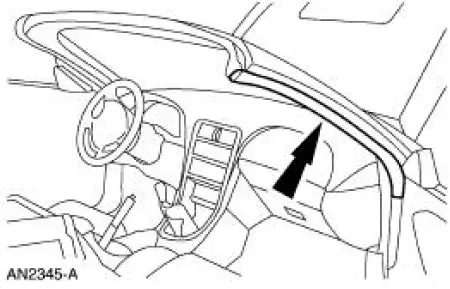
17. Install the roof side trim moulding.
Convertible
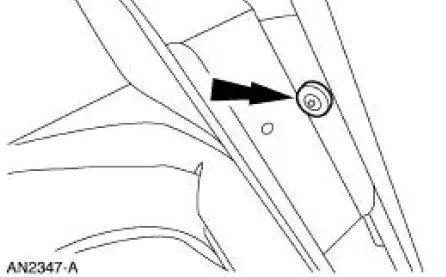
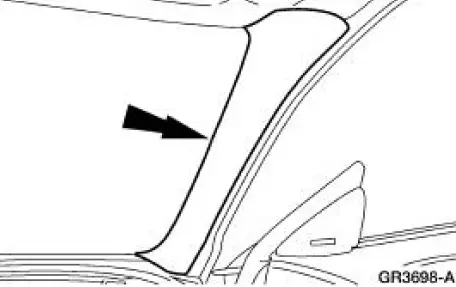
18. Install the exterior A-pillar moulding and screw.
19. Install the weatherstrip retainers.
20. Install the weatherstrips.
21. Position the sun visors and install the screws.
- Connect the electrical connector(s).

22. Install the visor trim moulding.
All vehicles
23. Install the RH and LH windshield side garnish moulding.
- If equipped with a convertible top, install the pin-type retainers.
24. Install the interior rear view mirror.
Door Glass Run Retainer
Removal
1. Remove the door trim panel. For additional information, refer to Section.
2. Remove the watershield.
3. Position the door window glass in the full up position.
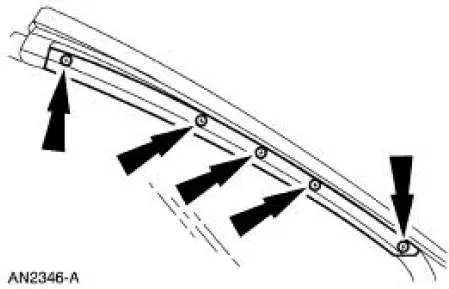
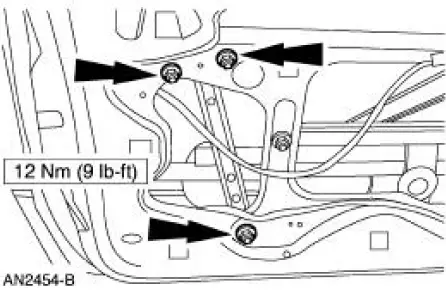
4. Remove the nuts and the door glass run.
Installation
1. To install, reverse the removal procedure.
 Removal
All vehicles
WARNING: To prevent glass splinters from entering eyes or
cutting hands, wear safety
glasses and heavy gloves when cutting glass from the vehicle.
1. Remove the RH and LH windshi ...
 Instrument Panel and Console
Torque Specifications
Instrument Panel
The instrument panel consists of the following components:
instrument cluster
instrument panel finish panels
audio unit
A/C controls
glove c ...
Other materials:
Principles of Operation
Power Window Control
NOTE: Battery power and ground must be removed before disconnecting the
GEM connectors to
avoid setting false DTCs.
The driver power window one-touch down operation is controlled by the
generic electronic module
(GEM). This featur ...
Installation
1. Install the lower intake manifold gaskets.
2. Connect the fuel charging wiring harness to the rear of the lower intake
manifold and install the
manifold.
3. Install the intake manifold fasteners and tighten in the sequence shown.
4. Position the fuel ...
Satellite radio information
Satellite Radio Channels
Sirius broadcasts a variety of music, news, sports, weather, traffic and
entertainment satellite radio channels. For more information and a
complete list of Sirius satellite radio channels, visit www.siriusxm.com in the
United States, ...
