Ford Mustang (1999-2004) Service Manual: Retractor - Front Seat Safety Belt, Coupe
Special Tool(s)
 |
Torx Bit, Safety Belt Bolt 501-010 (T77L-2100-A) |
Removal
1. Remove the quarter trim panel (31012). For additional information, refer to Section.
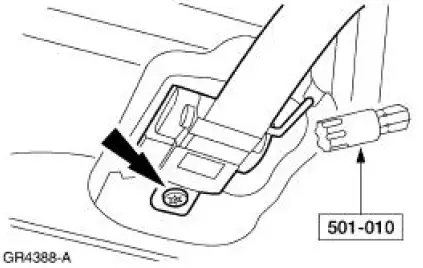
2. Using the special tool, remove the bolt and the safety belt retractor.
- Remove the mastic seal.
3. Using the special tool, remove the safety belt anchor bolt.
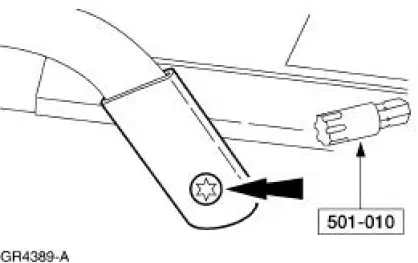
4. Using the special tool, remove the D-ring bolt.

Installation
NOTE: Make sure the retractor tongue faces inboard.
NOTE: Make sure the safety belt is not twisted.
1. The shipping clip must remain attached prior to the installation of the retractor into the vehicle.The clip must be removed after the retractor is installed.

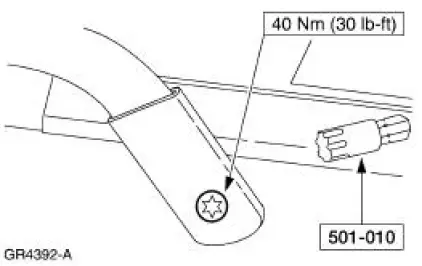
2. Position the safety belt anchor. Using the special tool, install the safety belt bolt.
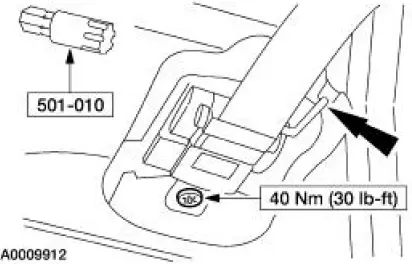
3. Install a new mastic seal around the safety belt retractor before installing the retractor in the vehicle.
4. Position the safety belt retractor. Using the special tool, install the bolt.
5. Using the special tool, install the D- ring bolt.

6. Install the quarter trim panel. For additional information, refer to Section.
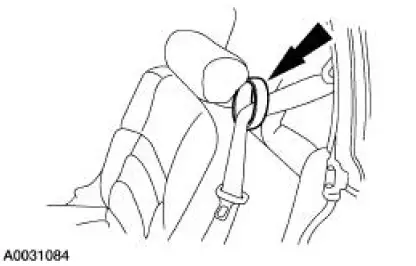
7. The shoulder belt must pass through the belt holder on the top of the seatback.
8. Check the active restraint system for correct operation.
 Safety Belt Tongue Rotated on Belt
1. Grasp the belt tongue and pull the belt webbing down to form a loop
through the upper (longer
and narrower) slot in the tongue.
2. Rotate and fold the belt webbing over itself within the slot to ...
 Retractor - Front Seat Safety Belt, Convertible
Special Tool(s)
Torx Bit, Safety Belt Bolt
501-010 (T77L-2100-A)
Removal
1. Remove the quarter trim panel (31012). For additional information, refer
to Section.
2. Remove the nut and ...
Other materials:
Wheel Knuckle - Cobra
Special Tool(s)
Front Hub Remover
205-D070 (D93P-1175-B) or
Equivalent
Steering Arm Remover
211-003 (T64P-9171-A)
...
Vibrate Software
Vibrate Software (Rotunda tool number 215-00003) is a diagnostic aid which
will assist in pinpointing
the source of unacceptable vibrations. The engine's crankshaft is the point of
reference for vibration
diagnosis. Every rotating component will have an angu ...
General information on radio frequencies
This device complies with part 15 of the FCC Rules and with Industry
Canada license-exempt RSS standard(s). Operation is subject to the
following two conditions: (1) This device may not cause harmful
interference, and (2) This device must accept any interferen ...
