Ford Mustang (1999-2004) Service Manual: Motor - Window Regulator
Removal
1. Remove the door trim panel. For additional information, refer to Section.
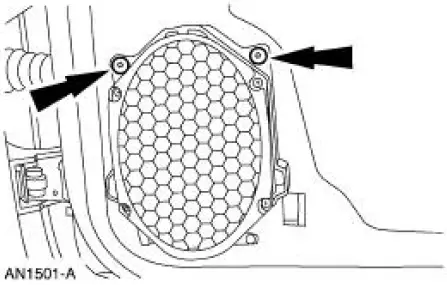
2. Remove the screws and the speaker.
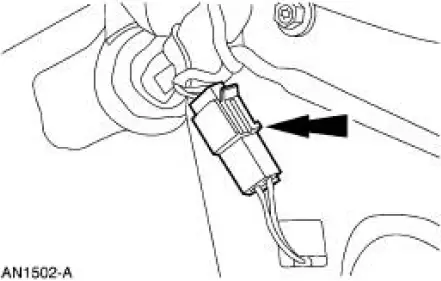
3. Disconnect the electrical connector.
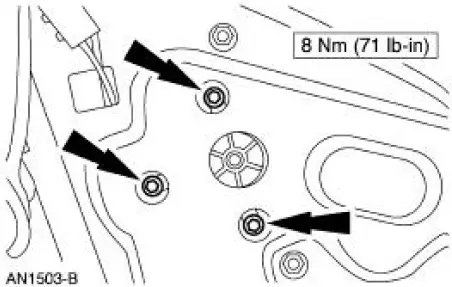
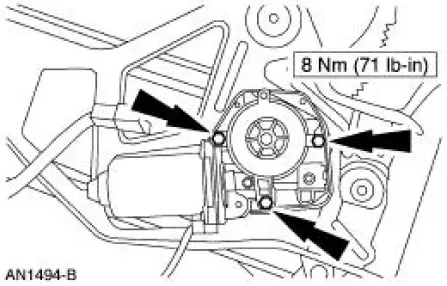
4. Remove the screws and the window regulator motor.
Installation
1. To install, reverse the removal procedure.
Motor -Window Regulator, Quarter
Removal
1. Remove the quarter trim panel. For additional information, refer to Section.
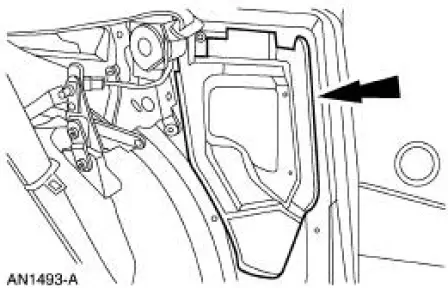
2. Remove the watershield.
3. Remove the quarter glass window regulator motor.
Installation
1. To install, reverse the removal procedure.
 Window Glass - Quarter, Convertible
Removal
1. Remove the quarter trim panel. For additional information, refer
to Section.
2. Disconnect the connectors and remove the screw.
3. Remove the screw.
4. Remove the screw and the ...
 Window Regulator - Power
Removal
1. Remove the door window glass. For additional information, refer to
Window Glass-Door in this
section.
2. Disconnect the electrical connector.
3. Remove the channel.
4. Remove ...
Other materials:
Using sync with your media player
You can access and play music from your digital music player over
the vehicle’s speaker system using the system’s media menu or voice
commands. You can also sort and play your music by specific categories,
such as artists, albums, etc.
SYNC is capable of ...
Exhaust Manifold to Exhaust Gas Recirculation (EGR)
Valve Tube - Mach I
Removal
1. Remove the air intake scoop. For additional information, refer to
Section.
2. Disconnect the exhaust gas recirculation (EGR) tube from the EGR valve.
3. With the vehicle in NEUTRAL, position it on a hoist.
4. Disconnect the EGR tube from th ...
Camshaft Runout
Special Tool(s)
Dial Indicator Gauge with
Holding Fixture
100-002 (TOOL-4201-C) or
equivalent
1. NOTE: Camshaft journals must be within specifications before
checking runout.
Use a Dial Indicator Gauge with Holding Fixture to measure the ...
