Ford Mustang (1999-2004) Service Manual: Spark Plug - Inspection
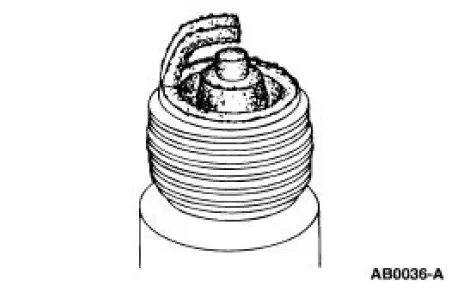
1. Inspect the spark plug for a bridged gap.
- Check for deposit build-up closing the gap between the electrodes. Deposits are caused by oil or carbon fouling.
- Clean the spark plug.
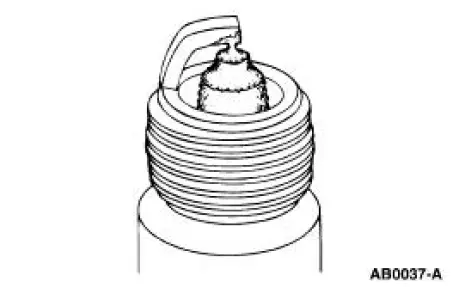
2. Check for oil fouling.
- Check for wet, black deposits on the insulator shell bore electrodes, caused by excessive oil entering the combustion chamber through worn rings and pistons, excessive valve-toguide clearance or worn or loose bearings.
- Correct the oil leak concern.
- Install a new spark plug.
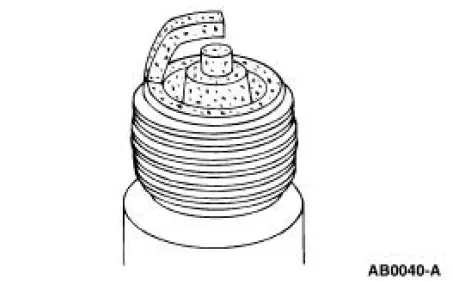
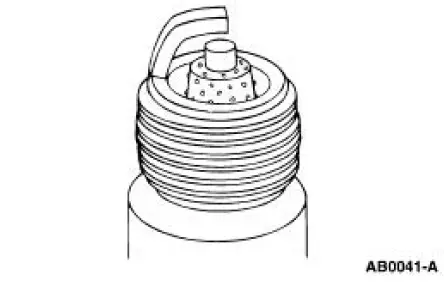
3. Inspect for carbon fouling. Look for black, dry, fluffy carbon deposits on the insulator tips, exposed shell surfaces and electrodes, caused by a spark plug with an incorrect heat range, dirty air cleaner, too rich a fuel mixture or excessive idling.
- Clean the spark plug.
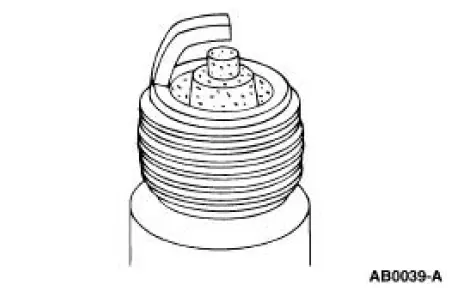
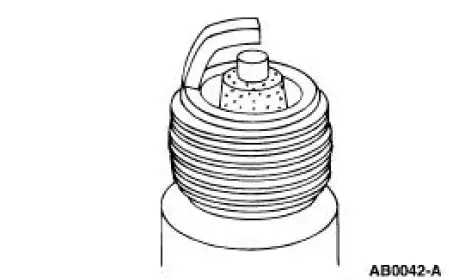
4. Inspect for normal burning.
- Check for light tan or gray deposits on the firing tip.
5. Inspect for pre-ignition, identified by melted electrodes and a possibly damaged insulator.
Metallic deposits on the insulator indicate engine damage. This may be caused by incorrect ignition timing, wrong type of fuel or the unauthorized installation of a heli-coil insert in place of the spark plug threads.
- Install a new spark plug.

6. Inspect for overheating, identified by a white or light gray spots and with bluish-burnt appearance of electrodes. This is caused by engine overheating, wrong type of fuel, loose spark plugs, spark plugs with an incorrect heat range, low fuel pump pressure or incorrect ignition timing.
- Install a new spark plug.
7. Inspect for fused deposits, identified by melted or spotty deposits resembling bubbles or blisters. These are caused by sudden acceleration.
- Clean the spark plug.
 Cylinder Block Core Plug Replacement
Special Tool(s)
Slide Hammer
100-001 (T50T-100-A)
Material
1. Use a slide hammer or tools suitable to remove the cylinder block core
plug.
2. Inspect the cylinder block plug bore f ...
 Exhaust Manifold - Inspection
Special Tool(s)
Straight Edge
303-D039 (D83L-4201-A) or
equivalent
1. Place a straight edge across the exhaust manifold flanges and check for
warping with a feeler
gauge.
Bearing ...
Other materials:
Manual Transmission and Clutch (Description and Operation)
The primary function of the clutch is to couple and uncouple engine
power to the transmission upon
driver command. For additional information, refer to Section.
Clutch Disc and Clutch Pressure Plate - 3.8L
Clutch Disc and Clutch Pressure Pl ...
Supercharger Cooling System Draining, Filling and
Bleeding
Draining
WARNING: Never remove the pressure relief cap while the engine is
operating or when the
cooling system is hot. Failure to follow these instructions can result in damage
to the cooling
system or engine or personal injury. To avoid having scalding hot ...
Crankshaft Pulley
Special Tool(s)
Remover, Crankshaft Vibration
Damper
303-009 (T58P-6316-D)
Installer, Crankshaft Vibration
Damper
303-102 (T74P-6316-B)
Material
Item
Specification
Silicone Gasket and Sealant
F7AZ-19554-EA or eq ...
