Ford Mustang (1999-2004) Service Manual: Shock Absorber
Removal
WARNING: All vehicles are equipped with gas pressurized shock absorbers which will extend unassisted. Do not apply heat or flame to the shock absorbers during removal or component servicing. Failure to follow these instructions can result in personal injury.
CAUTION: Suspension fasteners are critical parts because they affect performance of vital components and systems and their failure can result in major service expense. A new part with the same part number or an equivalent part must be installed, if installation is necessary. Do not use a part of lesser quality or substitute design. Torque values must be used as specified during reassembly to ensure proper retention of these parts.
1. Raise the vehicle on a hoist.
2. Remove the wheel and tire assembly.
3. Remove the front brake disc.
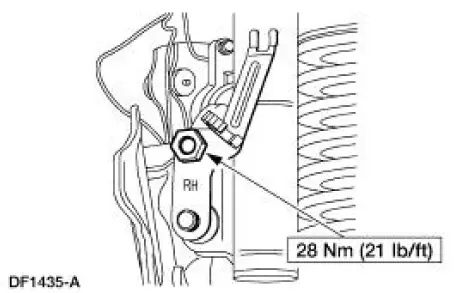
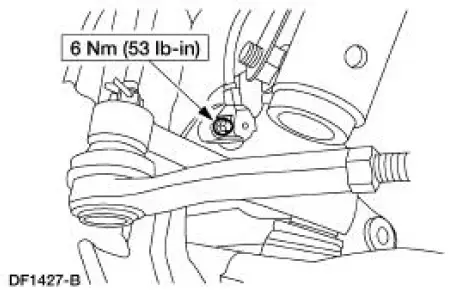
4. Remove the bolt and the ABS sensor.
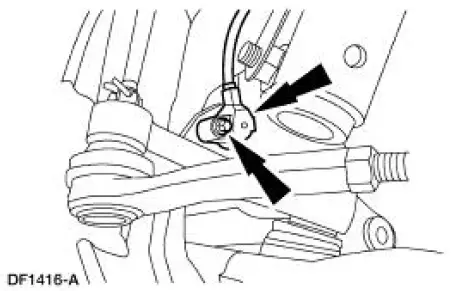
5. Unclip the ABS sensor wire from the bracket.
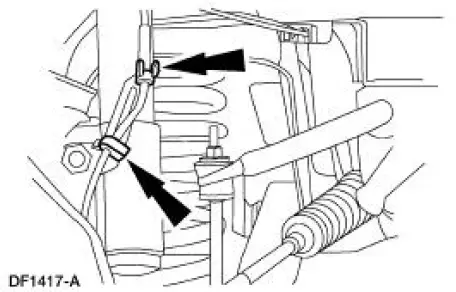
6. Remove the nut and the ABS sensor wire bracket.
7. Support the front suspension lower arm (3078) with a jack stand.
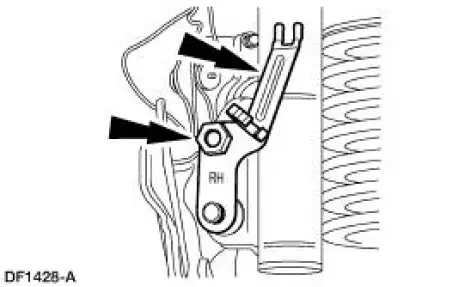
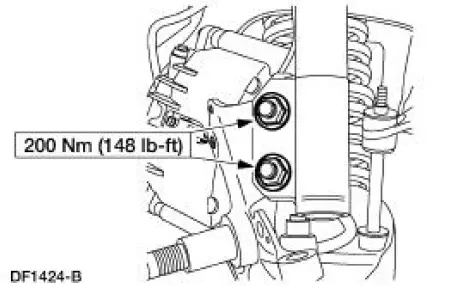
8. Disconnect the shock absorber (18124) from the spindle (3105).
1. Remove and discard the nuts and bolts.
2. Disconnect the shock absorber.
9. Carefully lower the front suspension lower arm and remove the jack stand.
10. CAUTION: Do not allow the weight of the vehicle to rest on the front brake disc shield. Damage to the shield can occur.
Lower the vehicle to access the upper mount nuts and bolt.
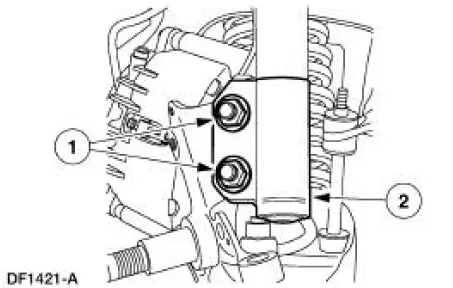
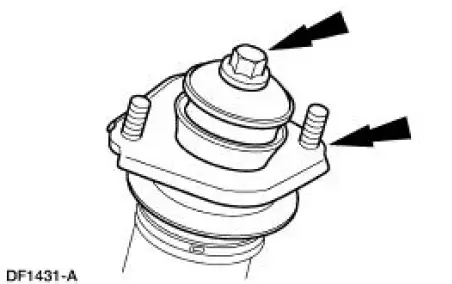
11. Remove the shock absorber.
1. Remove the bolt and nuts. Discard the nuts.
2. Remove the shock absorber.
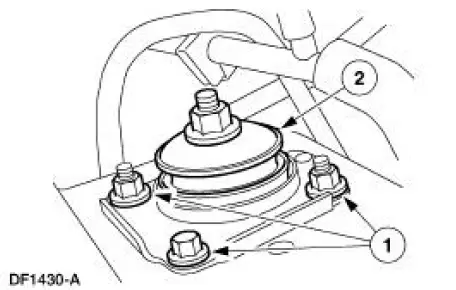
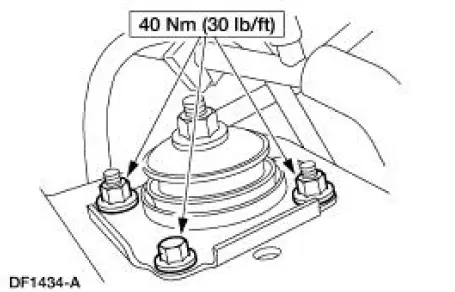
12. Position the shock absorber in a vise.
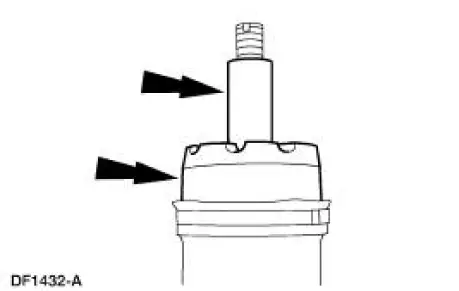
13. Remove the nut and the front shock absorber mounting bracket (18183).
14. Remove the sleeve and the bushing.
Installation
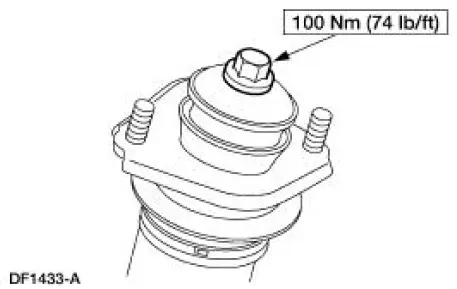
1. To install, reverse the removal procedure.
 Spindle
Special Tool(s)
Tie-Rod End Remover
211-001 (TOOL-3290-D) or
Equivalent
Removal
CAUTION: Suspension fasteners are critical parts because they affect
performance of vital
components and ...
 Spring
Special Tool(s)
Tie-Rod End Remover
211-001 (TOOL-3290-D) or
Equivalent
Coil Spring Compressor
204-D001 (D78P-5310-A) or
Equivalent
...
Other materials:
Installation
1. Install the upper arm and bushing to the mounting bracket.
1. Position the arm and bushing.
2. Install a new nut and bolt. Do not tighten at this time.
2. Connect the upper arm and bushing to the axle.
1. Position the arm and bushing.
2. Install a ...
Changing a road wheel
WARNING: The use of tire sealants may damage your tire
pressure monitoring system and should not be used. However, if
you must use a sealant, have an authorized dealer install a new tire
pressure monitoring system sensor and valve stem.
WARNING: See Tire Press ...
Window Glass - Quarter
Removal
1. Remove the quarter trim panel. For additional information, refer
to Section.
2. Remove the roof side trim moulding. For additional information, refer
to Section.
3. Remove the exterior quarter glass weatherstrip.
4. Remove the nuts.
...
