Ford Mustang (1999-2004) Service Manual: Wheel Hub and Bearing
Removal
CAUTION: Suspension fasteners are critical parts because they affect performance of vital components and systems and their failure can result in major service expense. A new part with the same part number or an equivalent part must be installed, if installation is necessary. Do not use a part of lesser quality or substitute design. Torque values must be used as specified during reassembly to ensure correct retention of these parts.
1. Raise the vehicle on a hoist.
2. Remove the wheel and tire assembly.
3. Remove the front brake disc.
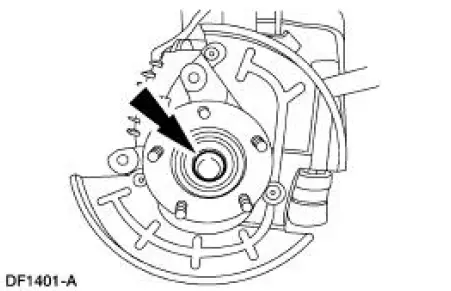
4. Remove and discard the front hub cap grease seal (1N135).
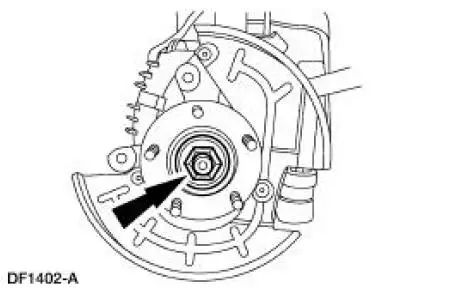
5. CAUTION: The wheel hub retainer (3B477) is a one time use item and must be replaced with a new retainer when removed. Failure to do so can cause the retainer to come loose during vehicle operation resulting in loss of vehicle control.
Remove and discard the front axle wheel hub retainer.
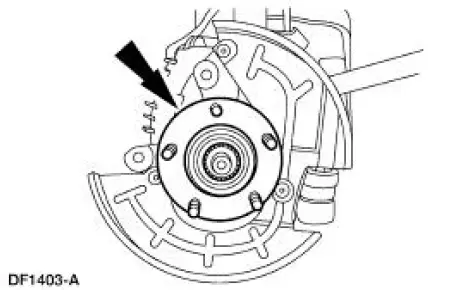
6. Remove the front wheel hub and bearing (1104).
Installation
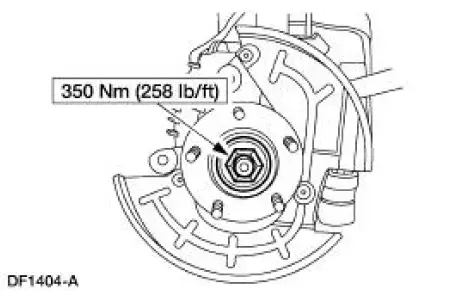
1. NOTE: Use a new wheel hub retainer and hub cap grease seal.
To install, reverse the removal procedure.
 Wheel Studs
Removal
1. Remove the wheel hub (1104). For additional information, refer to Wheel
Hub and Bearing in
this section.
2. Using a press, remove the wheel stud (1107) from the wheel hub.
Installation
1 ...
 Arm - Lower
Removal
CAUTION: Suspension fasteners are critical parts because they affect
performance of vital
components and systems and their failure can result in major service expense. A
new part with
the sa ...
Other materials:
Side airbags
WARNING: Do not place objects or mount equipment on or near
the airbag cover, on the side of the seat backs (of the front seats),
or in front seat areas that may come into contact with a deploying airbag.
Failure to follow these instructions may increase the ...
Gauges
Type 1
Cluster shown in standard measure. Metric similar.
A. Speedometer
B. Fuel gauge
C. Engine coolant temperature gauge
D. Tachometer
E. Information display. See Information displays for more information.
Fuel Gauge
Indicates approximately how much fuel i ...
Range Selection
The transmission has six range positions: P, R, N, (D), 2 and 1.
Park
In the PARK position:
there is no powerflow through the transmission.
the parking pawl locks the output shaft to the case.
the engine can be started.
the ignition key can ...
