Ford Mustang (1999-2004) Service Manual: Assembly
1. NOTE: One tab that locks the reverse clutch drum into the reverse sun shell may be removed.
This is done for balancing purposes.
Inspect the clutch cylinder thrust surfaces, piston bore and clutch plate serrations for scores or burrs. Minor scores or burrs may be removed with crocus cloth. Install a new clutch cylinder if badly scored or damaged.
2. Check the fluid passage in the clutch cylinder for obstructions. Clean out all fluid passages.
Inspect clutch piston for scores and install new if necessary. Inspect the check balls for freedom of movement and correct seating.
3. Check the clutch release spring for distortion and cracks. Install a new spring (including wave spring) if distorted or cracked.
4. Inspect the composition clutch plates, steel clutch plates and clutch pressure plate for worn or scored bearing surfaces. Install new parts if they are deeply scored or burred.
5. Check the clutch plates for flatness and fit on the clutch hub serrations. Discard any plate that does not slide freely on serrations or that is not flat.
6. Check the clutch hub thrust surfaces for scores and clutch hub splines for wear.
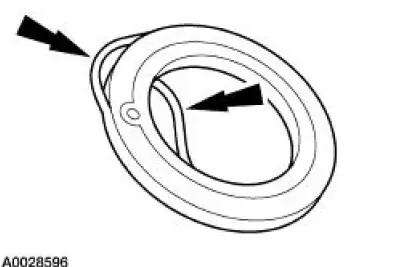
7. NOTE: The piston check ball must be present and moving freely.
Install a new reverse clutch piston inner and outer seals.
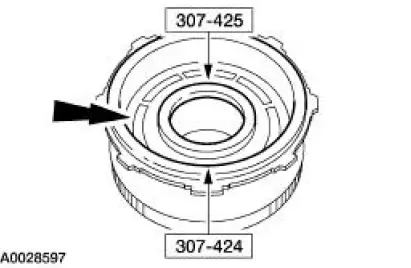
8. NOTE: Coat the reverse clutch piston inner seal, outer seal, drum sealing area and special tools with petroleum jelly.
Using the special tools, install the reverse clutch piston using even pressure to push it to the bottom of the reverse clutch drum.
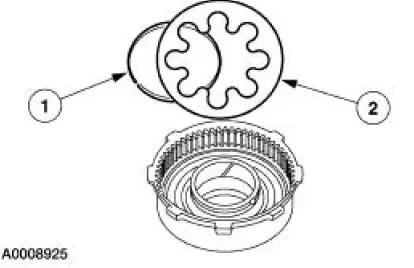
9. NOTE: The dished side of the reverse clutch piston spring must face the reverse clutch piston.
Install the reverse clutch piston spring.
1. Install the reverse clutch piston spring pressure ring.
2. Install the reverse clutch piston spring.
10. Using the special tools, compress the reverse clutch piston spring.
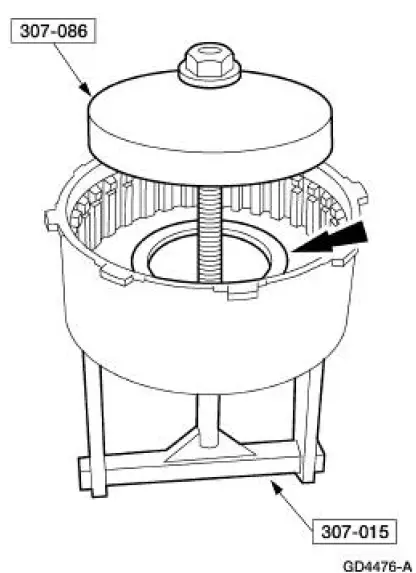
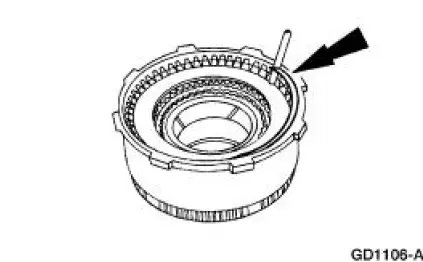
11. Install the reverse clutch piston spring retaining ring.

12. Remove the special tool.
13. CAUTION: Install the pressure plates with the flat sides facing the clutch pack.
NOTE: Before assembly, soak the new clutch discs in clean automatic transmission fluid for 15 minutes.
Install the reverse clutch front pressure plate, clutch pack and reverse clutch rear pressure plate.
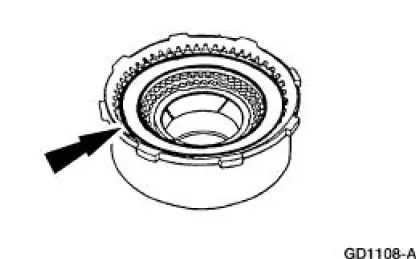
14. Install the reverse clutch pressure plate retainer snap ring.
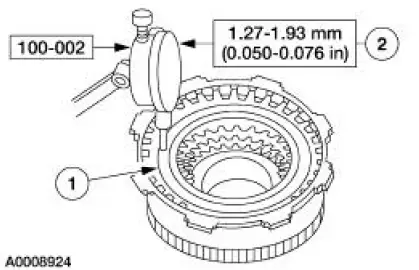
15. Install the special tool on the reverse clutch pack.
- Push downward on the clutch pack.
- Release pressure and zero the dial indicator.
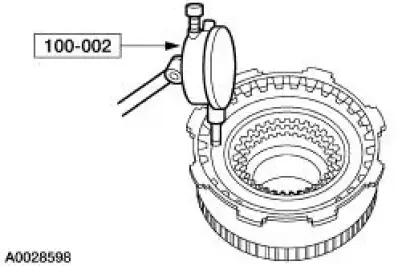
16. Using the special tool check the reverse clutch pack clearance.
1. Lift up on the clutch pack until it fully seats against the reverse clutch pressure plate retainer.
2. Read the dial indicator.
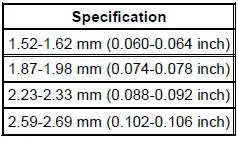
- If clearance is not within specifications, install the correct size retaining ring.
Selective Retaining Rings
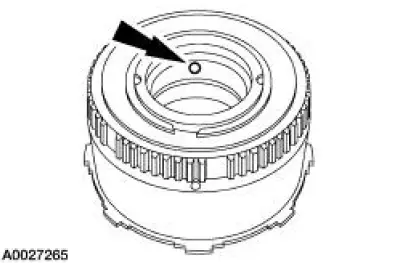
17. Check the clutch for correct operation.
- Apply air pressure to the reverse clutch drum. The clutch should be heard and felt to work without leakage.
 Disassembly
1. Inspect the clutch cylinder thrust surfaces, piston bore and clutch plate
serrations for scores or
burrs. Minor scores or burrs may be removed with a crocus cloth. Install a new
clutch cylinder i ...
 Forward Clutch Cylinder
Special Tool(s)
Dial Indicator Gauge with
Holding Fixture
100-002 (TOOL-4201-C) or
equivalent
Compressor, Clutch Spring
307-096 (T81P-70235-A)
Protector, Tra ...
Other materials:
Changing the vehicle battery
WARNING: Batteries normally produce explosive gases which
can cause personal injury. Therefore, do not allow flames, sparks
or lighted substances to come near the battery. When working near the
battery, always shield your face and protect your eyes. Always pro ...
Air Intake Scoop
Removal and Installation
1. Disconnect the air intake scoop outlet from the air cleaner.
2. Disconnect the air intake scoop water drain hoses.
3. Remove the air intake scoop from the air intake scoop bracket.
Remove the two air intake scoop bolts.
L ...
Driving through water
WARNING: Drive through water in an emergency only, and not
as part of normal driving.
WARNING: Engine damage can occur if water enters the air
filter.
Note: Driving through deep water may allow water into the transmission
or air intake and can cause internal v ...
