Ford Mustang (1999-2004) Service Manual: Axle Housing Bushing
Special Tool(s)
|
|
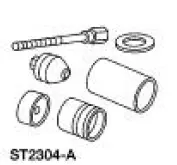
Axle Suspension Bushing Set 204-S030 (T78P-5638-A) |
Removal
CAUTION: Suspension fasteners are critical parts because they affect performance of vital components and systems and their failure can result in major service expense. A new part with the same part number must be installed if installation becomes necessary. If substitution is necessary, the part must be of the same finish and property class. Torque values must be used as specified during reassembly to make sure of correct retention of these parts.
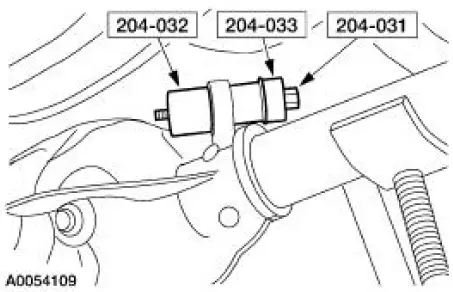
1. Remove the upper arm and bushing (5500). 2. Using the special tools, remove the bushing.

Installation
1. Using the special tools, install the bushing.
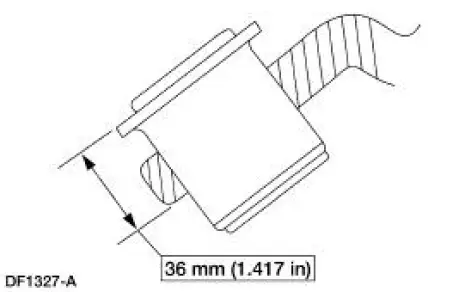
2. Using a suitable calibrated micrometer, measure the bushing as shown. If not within specifications, adjust as necessary.
3. Install the upper arm and bushing.
 Differential Housing Cover
Removal
1. Raise and support the vehicle.
2. NOTE: Empty the lubricant into a clean container for reuse.
Remove the differential housing cover (4033).
1. Remove the 10 bolts and drain the lubrica ...
 Drive Pinion
Special Tool(s)
Adapter for 205-S127
205-105 (T76P-4020-A3)
Adapter for 205-S127
205-109 (T76P-4020-A9)
Adapter for 205-S127
205-110 (T76P-4020-A10)
Adapter fo ...
Other materials:
Steering Column Switches
Torque Specifications
Steering Column Switches (DESCRIPTION AND OPERATION)
The steering column switches system consists of the following components:
multifunction switch (13K359)
key release button (manual transmission only) (3F527)
ignition switch (11572 ...
Removal
1. Remove brake master cylinder filler cap (2162). Check brake fluid
level in brake master cylinder
reservoir (2K478). Remove fluid until brake master cylinder reservoir is
half full.
2. Raise and support the vehicle.
3. Remove the wheel and ...
Cleaning products
For best results, use the following products or products of equivalent
quality:
Motorcraft Bug and Tar Remover (ZC-42)
Motorcraft Custom Bright Metal Cleaner (ZC-15)
Motorcraft Detail Wash (ZC-3-A)
Motorcraft Dusting Cloth (ZC-24)
Motorcraft Engine Shampoo and ...
