Ford Mustang (1999-2004) Service Manual: Axle Housing Casting Porosity (Holes in Casting) Repair
CAUTION: To keep the axle's sound characteristics, do not disassemble the carrier.
NOTE: Casting porosity is a condition where occasionally gas bubbles will form during the casting process leaving small pockets in the metal that will cause the axle housing to leak.
1. To fill small pockets, peen in a small amount of body lead.
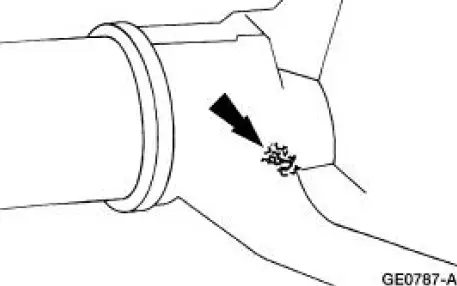
2. Seal the pocket.
- Use epoxy sealer meeting Ford specification M-3D35A(E).
3. To fill large pockets, drill and tap a shallow hole for a small setscrew. Install the setscrew and seal it.
- Use epoxy sealer meeting Ford specification M-3D35A(E).
Axle Housing Weld Leaks Repair
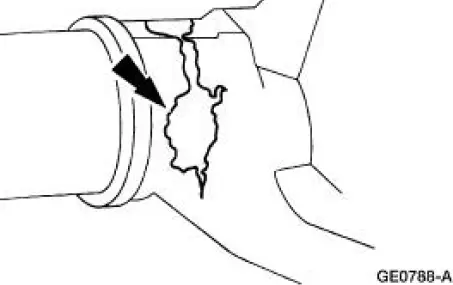
1. CAUTION: To keep the axle's sound characteristics, do not disassemble the carrier.
CAUTION: Rear axle housing straightness is too critical for field repair. Install a new axle housing if a weld is broken.
NOTE: Most minor weld leaks are repairable. This includes the puddle and fill welds that join the axle shaft tube to the axle housing on integral axles.
Seal the weld.
- Use Devcon Aluminum Liquid F2 or equivalent meeting Ford specification M-3D35A(E).
 Driveline Angle Inspection
Special Tool(s)
Anglemaster II Driveline
Inclinometer
164-R2402 or equivalent
NOTE: An incorrect driveline angle can cause a vibration or shudder.
1. Check the vehicle for evidence o ...
 Driveshaft
Torque Specifications
Description
Nm
lb-ft
Pinion flange bolts
112
83
...
Other materials:
Mass Air Flow (MAF) Sensor - 3.8L
Removal
CAUTION: The mass air flow (MAF) sensor hot wire sensing
element and housing are
calibrated as a unit and must be repaired as a complete assembly. Do not
damage the sensing
element (internal to housing) or possible failure to the mass air f ...
Pressure Plate Check
1. Check the clutch pressure plate surface for scoring, cracks or
discoloration. Minor scratches or
discoloration should be removed with a fine emery cloth.
2. Measure the flatness of the clutch pressure plate surface with a
straightedge and a feeler
g ...
Air Cleaner Element - 4.6L (2V)
Removal and Installation
1. Remove the air cleaner outlet tube (9B659). For additional
information, refer to Air Cleaner
Outlet Pipe-4.6L (2V) in this section.
2. Remove the mass air flow (MAF) assembly.
1. Release the clip.
2. Remove the MAF sens ...
