Ford Mustang (1999-2004) Service Manual: Engine and Radiator Flushing
Special Tool(s)
|
|
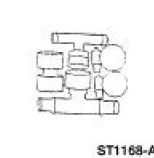
Coolant System Drain/Flush/Fill 164-R3673 or equivalent |
 |
Flush Kit 164-R3658 or equivalent |
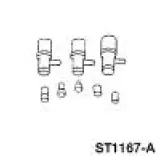 |
Drain Kit 164-R3662 or equivalent |
Material
| Item | Specification |
| Motorcraft Premium Cooling System Flush VC-1 or equivalent | ESR-M14P7-A |
| Motorcraft Premium Gold Engine Coolant VC-7-A (in Oregon VC-7-B) (yellow color) | WSS-M97B51- A1 |
1. WARNING: Never remove the pressure relief cap while the engine is operating or when the cooling system is hot. Failure to follow these instructions can result in damage to the cooling system or engine or personal injury. To avoid having scalding hot coolant or steam blow out of the degas bottle when removing the pressure relief cap, wait until the engine has cooled, then wrap a thick cloth around the pressure relief cap and turn it slowly. Step back while the pressure is released from the cooling system. When you are sure all the pressure has been released, turn and remove the pressure relief cap (still with a cloth).
Once pressure is released, remove the pressure relief cap/radiator cap.
2. Drain the cooling system. For additional information, refer to Cooling System Draining, Filling and Bleeding in this section.
3. Remove the coolant thermostat. For additional information, refer to Thermostat-3.8L , Thermostat-4.6L(2V) or Thermostat-4.6L(4V) in this section.
4. Install the coolant hose connection without the thermostat.
5. NOTE: Refer to the cooling system flusher manufacturer's operating instructions for specific vehicle hook-up.
NOTE: The addition of Motorcraft Cooling System Stop Leak Pellets, VC-6, darkens Motorcraft Premium Gold Engine Coolant from yellow to golden tan.
Using an appropriate cooling system flusher, flush the engine and radiator.
Use Ford Premium Cooling System Flush VC-1 or equivalent meeting Ford specification ESRM14P7- A. Always flush the cooling system with water thoroughly after using the VC-1 flush and prior to filling the cooling system with the same coolant that was present in the system. Do not mix coolant types.
6. Install the thermostat.
7. Backflush the heater core. For additional information, refer to Heater Core Backflushing in this section.
8. Fill the cooling system. For additional information, refer to Cooling System Draining, Filling and Bleeding in this section.
 Cooling System Draining, Filling and Bleeding
Material
Item
Specification
Motorcraft Premium Gold
Engine Coolant
VC-7-A (in Oregon VC-7-B)
(yellow color)
WSS-M97B51-
A1
Draining
WARNING: Never remove the pressure relief ...
 Heater Core Backflushing
Special Tool(s)
Flush Kit
164-R3658 or equivalent
Drain Kit
164-R3662 or equivalent
Material
Item
Specification
Motorcraft Premium Cooling
System Flush ...
Other materials:
Air Conditioning (A/C) Compressor Shaft Seal
Special Tool(s)
Holding Fixture, Compressor
Clutch (3.8L vehicles)
412-098 (T94P-19703-AH)
Holding Fixture, Compressor
Clutch (4.6L vehicles)
412-103 (T95L-19703-AH)
Protector, A/C Compressor
Shaft Oil Seal
412-06 ...
Cylinder Heads (Removal)
Special Tool(s)
Remover, Crankshaft Vibration
Damper
303-009 (T58P-6316-D)
Remover, Crankshaft Front Oil
Seal
303-107 (T74P-6700-A)
Engine Lift Bracket Set
303-DS086 (D93P-6001-A)
Compressor, Valve Sprin ...
Engine (Installation)
Special Tool(s)
Spreader Bar
303-D089 (D93P-6001-A3)
Support Bracket, Engine
303-639
Lifting Bracket, Engine
303-D087 (D93P-6001-A1)
Lifting Bracket, Engine
303-D088 (D93P-6001-A2)
Lifting Brac ...
