Ford Mustang (1999-2004) Service Manual: Installation
All vehicles
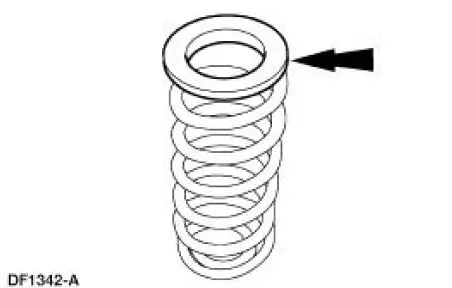
1. NOTE: Inspect the insulators for wear or damage. Install new insulators if necessary.
Install the upper insulator on the spring.
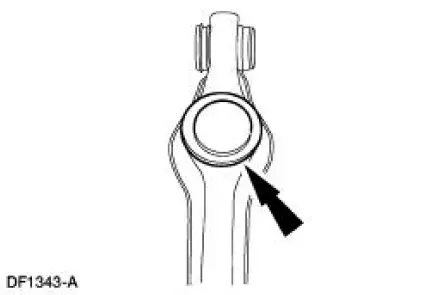
2. Install the lower insulator on the lower arm.
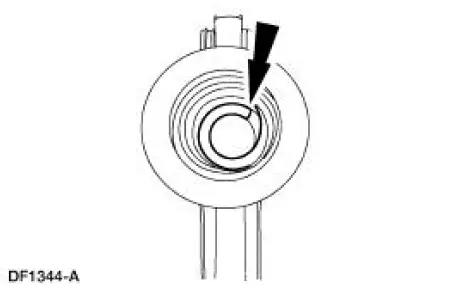
3. Install the rear spring. Make sure the pigtail on the lower arm is at the rear of the vehicle and pointing toward the left side of the vehicle.
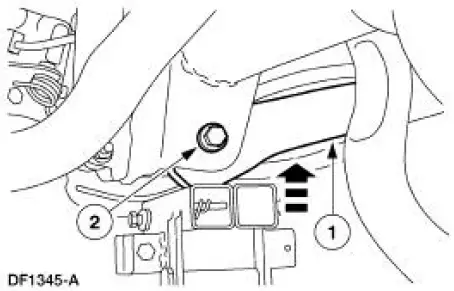
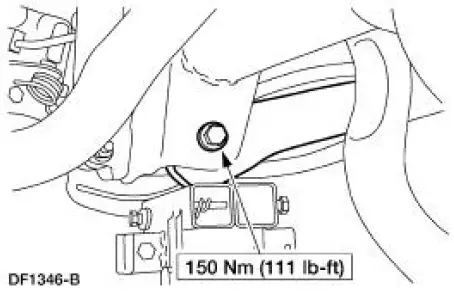
4. Install the pivot bolt.
1. Carefully raise the lower arm into position with the special tool 014-00942.
2. Install a new pivot bolt and nut. Do not tighten at this time.
5. Remove the special tool 014-00942.
6. Raise the suspension until the shock absorber is compressed to the alignment mark (curb height).
7. Tighten the lower arm-to-axle pivot bolt.
8. Lower the rear suspension and remove the jack stand.
Vehicles equipped with a 4.6L 2V engine
9. Install the stabilizer bar. For additional information, refer to Stabilizer Bar in this section.
All vehicles
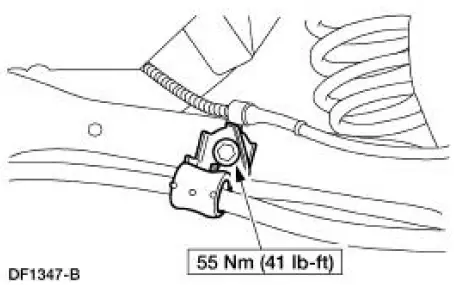
10. Install the parking brake cable bracket and a new bolt.
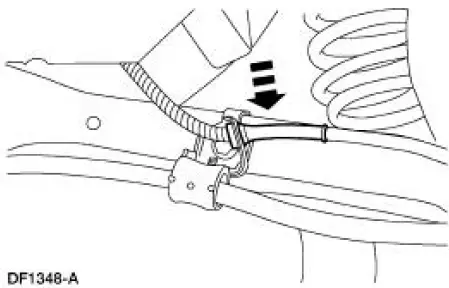
11. Connect the anti-lock sensor wire.
12. Lower the vehicle.
 Removal
CAUTION: Suspension fasteners are critical parts because they affect
performance of vital
components and systems and their failure can result in major service expense. A
new part with
the same part ...
 Spring - Cobra
Special Tool(s)
Rotunda Powertrain Lift
014-00765 or Equivalent
...
Other materials:
Compressor Manifold and Tube Assembly - 4.6L
Material
Item
Specification
PAG Refrigerant Compressor
Oil (R-134a Systems)
F7AZ-19589-DA (Motorcraft YN-
12-C)
WSH-M1C231-
B
Removal and Installation
NOTE: Installation of a new suction accumulator is not required when
repairing the ...
General information
WARNING: Driving while distracted can result in loss of vehicle
control, accident and injury. Ford strongly recommends that drivers
use extreme caution when using any device or feature that may take their
focus off the road. Your primary responsibility is the ...
Installation
1. NOTE: This procedure applies to both the LH and RH halfshafts.
Install a new driveshaft bearing retainer circlip.
2. Remove the special tool.
3. CAUTION: Differential seal damage will occur if installing the
halfshaft without the
special tool installed. ...
