
Ford Mustang (1999-2004) Service Manual: Intermediate One-Way Clutch
Intermediate Clutch Cylinder Disassembled View
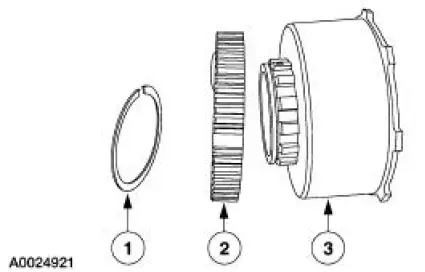
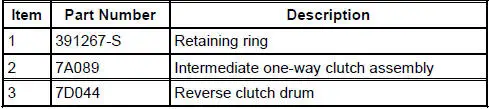
Disassembly
1. NOTE: One tab that locks the reverse clutch drum into the reverse sun shell may be removed.
This is done for balancing purposes.
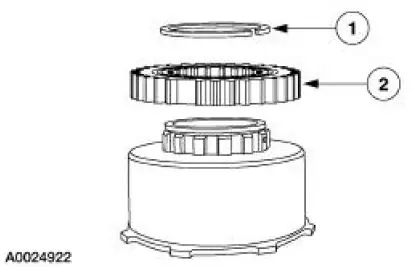
Remove the intermediate one-way clutch.
1. Remove the snap ring.
2. Remove the intermediate one-way clutch.
Assembly
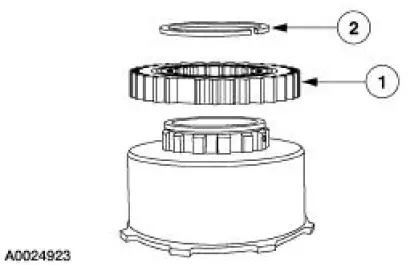
1. NOTE: The intermediate one-way clutch must rotate counterclockwise when installed on the reverse clutch drum and will make a ratchet sound.
Install the intermediate one-way clutch.
1. Install the intermediate one-way clutch.
2. Install the snap ring.
 Assembly
1. Using the special tool, install the front pump seal assembly.
2. Install the clutch piston seals.
1. Install the intermediate clutch piston outer seal.
2. Install the intermediate clutch pist ...
 Reverse Clutch
Special Tool(s)
Dial Indicator Gauge with
Holding Fixture
100-002 (TOOL-4201-C)
Compressor, Clutch Spring
307-015 (T65L-77515-A)
Protector, Transmission
Reve ...
Other materials:
Pinpoint Test M: DTC B1891 - Air Bag Tone Warning Indicator Circuit
Shorted to Battery or
Ignition
Normal Operation
The restraints control module (RCM) monitors its connection to the
generic electronic module (GEM) at
pin 10. This connection is used to signal a chime if the air bag
indicator is inoperative and another SRS
fault exists. If the RC ...
Valve Cover RH
Material
Item
Specification
Metal Surface Cleaner
F4AZ-19A536-RA or equivalent
WSE-M5B392-
A
Silicone Gasket and Sealant
F7AZ-19554-EA or equivalent
WSE-M4G323-
A4
PAG Refrigerant Compressor
Oil
F7AZ-19589-DA (Motorcraf ...
Brake Caliper Anchor Plate - Cobra
Removal
1. Remove the pads. For additional information, refer to Brake
Pads-Cobra in this section.
2. Remove the anchor plate bolts.
Installation
1. Follow the removal procedure in reverse order.
...
