Ford Mustang (1999-2004) Service Manual: Planetary Gear Support Assembly and Planetary One-Way Clutch
Disassembly and Assembly
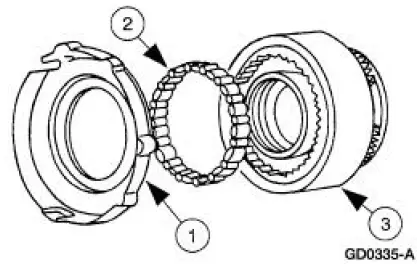
1. NOTE: Inspect the outer and inner races for scores or damaged surface areas where rollers contact the races. Inspect the rollers and springs for excessive wear or damage. Inspect the spring and cage for bent or damaged spring retainers.
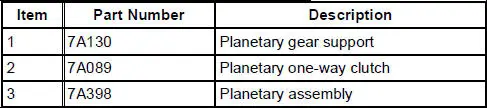
Rotate the center support counterclockwise and lift to remove the planetary gear support.
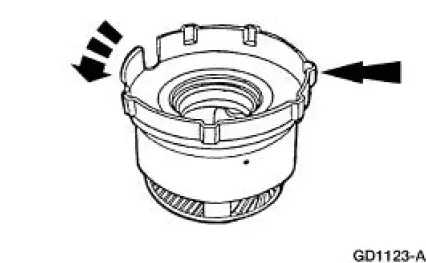
2. Remove the planetary one-way clutch.
3. To assemble, reverse the disassembly procedure
 Assembly
1. Inspect the clutch cylinder thrust surfaces, piston bore and clutch plate
serrations for scores or
burrs. Minor scores or burrs may be removed with crocus cloth. Install a new
clutch cylinder if
...
 Reverse Sun Gear
Disassembly
1. Remove the reverse clutch sun gear assembly and the No. 4 forward clutch
hub bearing and
race.
2. Remove the forward clutch sun gear assembly and the No. 5 forward clutch
...
Other materials:
Water Bypass Hose - 3.8L
Removal and Installation
1. Drain the engine coolant. For additional information, refer to Cooling
System Draining, Filling
and Bleeding in this section.
2. Remove the bypass hose.
3. To install, reverse the removal procedure.
4. Fill and bleed the co ...
Compressor Manifold and Tube Assembly - 3.8L
Material
Item
Specification
PAG Refrigerant Compressor
Oil (R-134a Systems)
F7AZ-19589-DA (Motorcraft YN-
12-C)
WSH-M1C231-
B
Removal and Installation
NOTE: Installation of a new suction accumulator is not required when
repairing the ...
Muffler - 3.8L
Removal and Installation
1. Raise and support the vehicle. For additional information, refer to
Section.
2. Support the rear axle with a suitable jack.
3. Remove the upper arm-to-differential bolt.
4. Remove the nut and bolt and disconnect the rear shock ...
